admin

Hoof Automotive > Articles by: admin

Hankook Tyre UK wins TyreSafe’s Tyre Manufacturer of the Year Award for the second consecutive time

November 3, 2020 / 85 Comments / 708 / Blog

news_img_2020_1030


Hankook Tyre UK is once again announced as the winner of TyreSafe’s Tyre Manufacturer of the Year Award. The award recognizes Hankook’s significant contribution to raising driver awareness of tire safety-related issues. The tire maker is commended for delivering engaging campaigns to UK drivers, informing and educating them on the importance of tire safety and maintenance.

Daventry, UK, October 30, 2020 – Global leading tire maker Hankook Tire is announced as the winner of road safety charity Tyresafe’s Tyre Manufacturer Award 2020. The award recognizes the continued contribution by Hankook to raise awareness of tire safety over the past twelve months. Hankook was also presented with this award in 2019. Over the past twelve months Hankook UK launched three tire safety campaigns across social channels including Facebook and YouTube. The first incorporated Tyresafe’s ‘Summer Motoring’ campaign to make drivers aware that more tire-related incidents happen on British roads during the summer months1 than at any other time of the year, and to remind them to check their tires before setting off on holiday.

The second campaign was activated in collaboration with a social media influencer, with video content informing drivers on topics such as how to maintain their tires’ condition for optimum performance and control and lower fuel consumption, choosing the right tire for the season, ensuring the correct tire pressure and how to check their tread.

The third campaign informed and educated drivers on the function of tire tread, pattern differences on summer, all-season and winter tires and also why they need to prioritize their tire safety in anticipation of the winter weather and road conditions.

Declaring Hankook Tyre UK as TyreSafe’s 2020 winner of the Tyre Manufacturer of the Year Award 2020, TyreSafe Chair and Chair of Awards Judging, Stuart Jackson said, “Hankook’s commitment to raise awareness on tire safety resulted in a well targeted campaign, which highlighted specific messages relevant to their core age group. A good library of resources was created to support it resulting in a program of clear and engaging content. Congratulations Hankook on being TyreSafe’s Tyre Manufacturer of the Year Award winner.”

Zoë Baldwin, Marketing Manager of Hankook Tyre UK said: “We are delighted to have won this highly coveted award for the second year running, and are thrilled to be recognized for the effort we put into sharing tire safety messages with millions of drivers. Hankook continues to raise awareness of the importance of tire maintenance and the dangers of defective and illegal tires to reduce the number of tire-related incidents on Britain’s roads.”

1 Behnom Havaei-Ahary (2019). Road Traffic Estimates: Great Britain 2018. UK Department for Transport.
https://assets.publishing.service.gov.uk/government/uploads/system/uploads/attachment_data/file/808555/road-traffic-estimates-in-great-britain-2018.pdf


Source: Hankook Tire Malaysia

Importance of oil

January 16, 2020 / 23 Comments / 1155 / Blog

oil drop

Why is your oil so important?
As the heart of any vehicle, the engine requires the right lubrication and protection to keep it running smoothly and efficiently. Mobil™ oil products are designed to provide superior engine protection, keeping your engine running like new even under the most demanding conditions.


On the highway

Cruising: In ideal driving conditions, the oil will be at the ideal temperature so fuel and water will not accumulate.
High speed: Fast acceleration and running at high speed can raise oil temperature and reduce oil viscosity, exposing the engine to greater wear. Oils designed to operate under higher temperatures can keep the engine protected, prolonging engine life and maintaining efficiency.


In the city
Frequent starts and stops: Oil may not sufficiently warm up, and may accumulate water and fuel due to prolonged idling, causing corrosion and sludge.
Heavy traffic: Encountering a traffic jam after driving at high speed for a period of time can cause thermal stress on the engine, making it run hotter.
Environment

Cold weather: Oil thickens at low temperatures, reducing pumping efficiency and takes longer to reach critical engine parts to provide lubrication and protection.

Hot weather: High-temperature environments can make it more difficult to keep the engine cool. Engine oils not designed to perform under high temperatures may suffer a reduced ability to protect the engine’s moving parts.

Wet environments: Driving in humid environments can cause moisture accumulation and acid formation in the oil, which then corrodes metal parts and shortens the oil life.

Dust and sand: Dust and sand present a serious problem for engines and may contaminate the oil, greatly increasing the wear on moving parts.


Engine technology
Direct injection diesel engines: Soot particles may remain in the oil and combine into a block, causing accelerated wear of metal parts.
Turbocharger: Using low-quality oil can result in the formation of carbon deposits on the turbocharger, a common cause of turbocharger failure.
Fuel quality: Low-quality components in fuel can contaminate and degrade engine oil, leading to oil pollution and the formation of sludge.
Overused oil: Many vehicle owners extend the oil change maintenance cycle past the manufacturer’s recommendation. Higher quality oil can maintain effective lubrication for a longer period of time, keeping the engine running smoothly.
Harsh Operation
Overloading: Carrying heavy loads puts greater stress on the engine, requiring a higher level of lubricating oil to provide protection.
Racing: Fast acceleration and running at very high speed puts the engine under extreme stress. High-quality oil designed to perform under these conditions is required to keep the engine protected and running smoothly.
Source: Mobil

Engine Oil 101: Choosing the Right Oil for Your Car

September 20, 2019 / 5 Comments / 1147 / Blog

We know how it feels when you get a new car. If you could, you’d bubble wrap everything to keep it in pristine condition. Well, there is one way to keep your car performing like new without going to such extremes – engine oil!

But why would a new car need engine oil?

Well, even high performance race cars like Porsches and Corvettes use it from day one – and more specifically, Mobil 1TM. Beyond improving fuel consumption, engine oil optimizes engine performance and keeps it running for longer.

Now before we delve into the nitty-gritty of engine oil, go ahead and pull out your car owner’s manual. In it, you’ll find clear guidance on viscosity, certifications and specifications that the manufacturer recommends for your engine.

If all this is new to you, don’t worry. We’ll start you off with the basics of engine oil.

1. Viscosity

Think about honey and water. When you pour them from a cup, both liquids flow at different speeds. That’s viscosity! For engine oils, viscosity determines the speed it flows to protect the engine. A greater number represents a higher viscosity, which means the oil is more viscous and more resistant to flow.

If you use a viscosity that is too high, you’ll experience unresponsiveness in your engine. This means that more energy (i.e. fuel) is needed for your engine to overcome the oil’s resistance to flow, in order to reach critical engine parts. Newer engines typically require ‘light’ engine oil. So this makes a lower viscosity oil like Mobil 1 0W-40 the perfect choice for engine and fuel efficiency.

2. Types of engine oil

Yes there is more than one! Again, look to your car manual for guidance on what your engine needs. At the same time, it’s worth understanding the key differences between full synthetic, semi-synthetic and mineral oils.

In general…

  • Mineral oil has a relatively low resistance to heat and oxidation. They last 5,000km, on average. This means you need to change your engine oil more frequently– costing you dollars and precious time.But if your engine is older and has always used mineral oil, continuing with the oil will still provide beneficial protection for your engine.
  • Full synthetic oil has high resistance to heat and oxidation. It can last more than 10,000km between oil changes. With a longer oil change interval, you don’t need to visit your mechanic quite so often.Being more “slippery”, full synthetic oil has better anti-friction properties than mineral oil. With better engine responsiveness and fuel economy, it also helps extend your engine life. This is especially useful if you drive in stop-and-go city traffic.If your car is new and pre-filled with a synthetic oil from day one, using Mobil 1 synthetic oil can keep your car performing like new for a long time.
  • Semi synthetic oils are a blend of mineral and synthetic oils, offering you the benefits of both.


Now you know that your Mobil engine oil is exceeding industry certifications, what’s next?

3. OEM specifications

Recognize that even if the viscosity is the same, not all engine oil brands have the same level of certification. Reputable brands like Mobil 1 also adhere to OEM specifications by top car manufacturers such as Mercedes AMG and McLaren. So opting for Mobil means your oil has proven performance and quality that is fully endorsed by renowned OEMs!

4. Certifications

Yes, even engine oils need certification. Mobil 1 oils are formulated to meet industry certifications, and beyond. Our range of Mobil engine oils are formulated to surpass even the most stringent criteria set by high-performance automaker groups, such as:

  • API (American Petroleum Institute)
  • ACEA (Association of Certified European Automakers
  • ILSAC (International Lubricant Standardization and Approval Committee)

So when you see the above acronyms on your Mobil engine oil bottle, rest assured that it has been certified by experts.

Before you judge an engine oil by its label…

Remember that reputable Mobil-branded engine oil family offers a full spectrum of products that you can choose from. Go on, ask your mechanic to use Mobil oil in your next car servicing appointment and enjoy how it keeps your engine performing like new, for a long, long time.

Here’s a quick checklist to help you pick engine oils for your car.

checklist
Source: Mobil

7 Simple Tyre Tips For Safer Driving

May 3, 2019 / 5 Comments / 1694 / Blog

Driving Tips


Source: Goodyear

TPMS LIGHT ON? WHAT IT MEANS & WHAT YOU NEED TO DO

February 20, 2019 / 5 Comments / 1283 / Blog

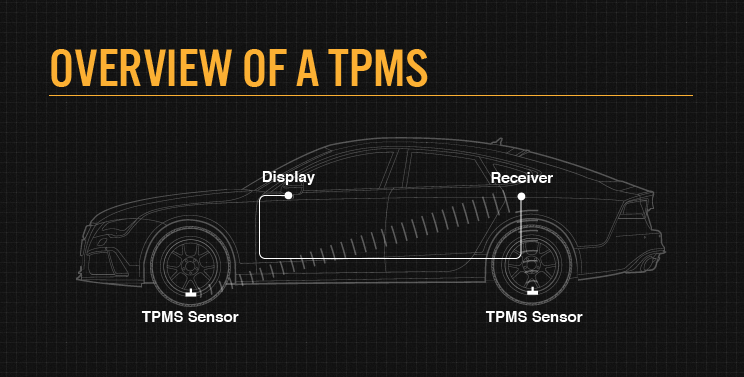
The purpose of the Tyre Pressure Monitoring System (TPMS) is to alert you when tyre pressure is too low and could to create unsafe driving conditions. If the light is illuminated, it means your tyres could be underinflated, which can lead to undue tyre wear and possible tyre failure. It’s important to understand the importance of proper tyre inflation, and how TPMS can help you maintain your tyres.

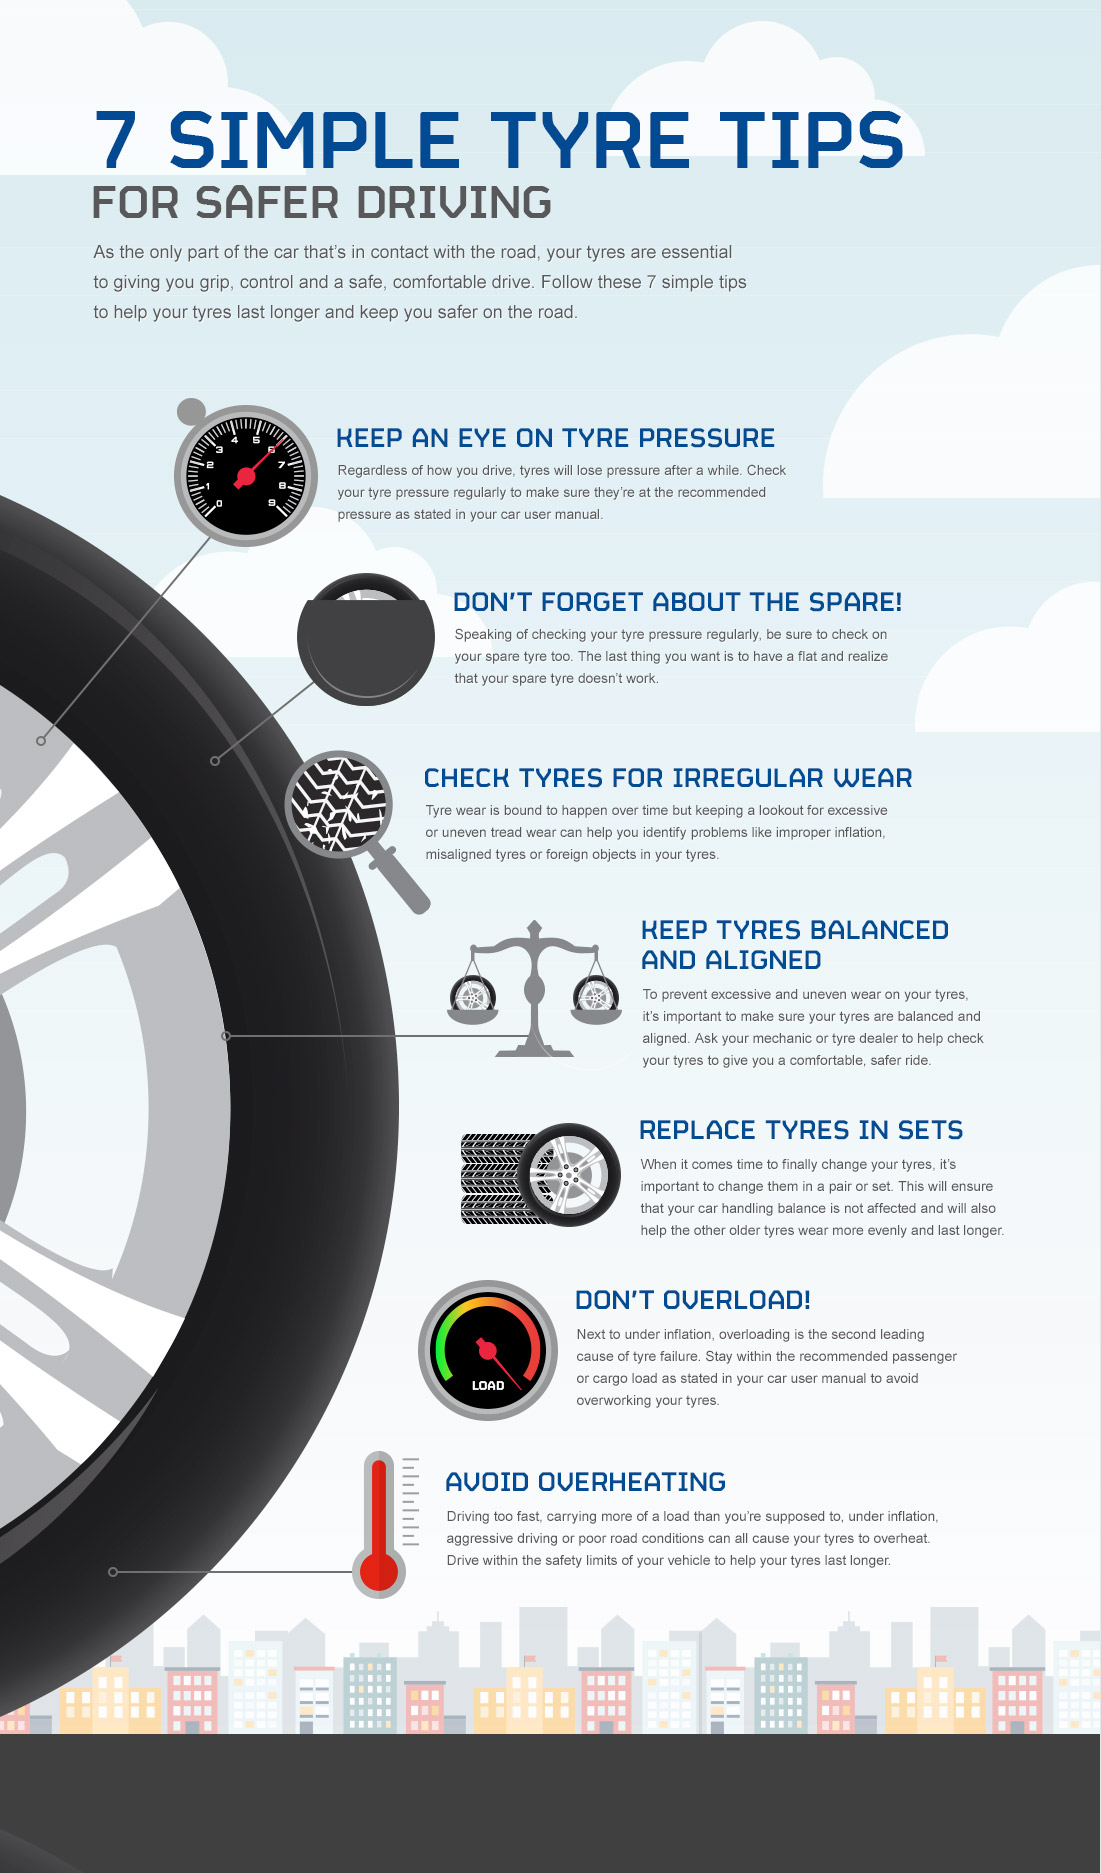
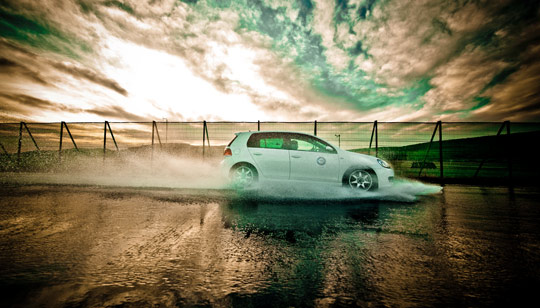
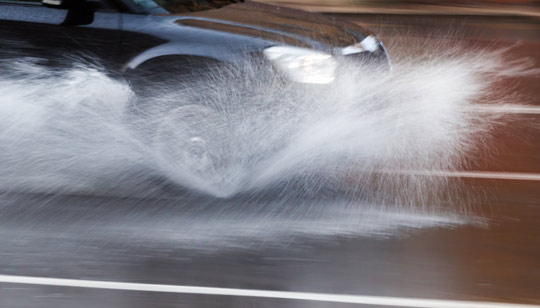
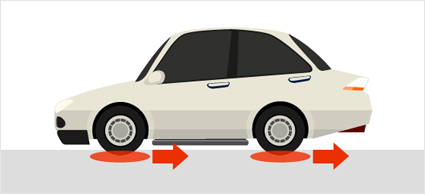
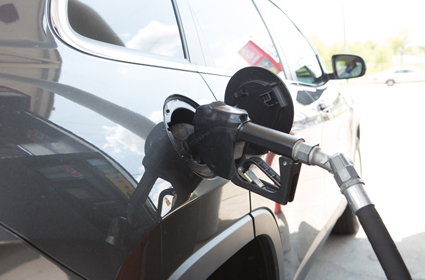
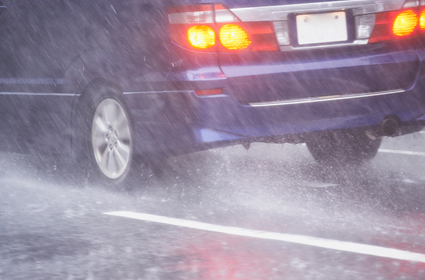
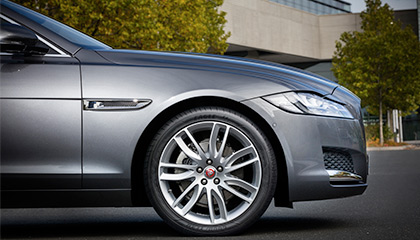
Maintaining proper tyre inflation is essential to vehicle handling, overall tyre performance, and load carrying capability. A properly inflated tyre will reduce tread movement, reduce rolling resistance, and increase water dispersion. Reduced tread movement gives the tyre a longer tread life. Reduced rolling resistance, the force required to roll a loaded tyre, results in increased fuel efficiency. Increased water dispersion decreases the possibility of hydroplaning.

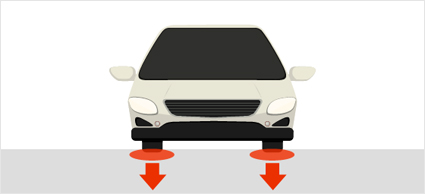
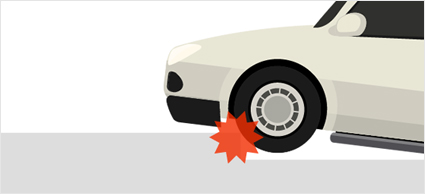
Both over inflation and under inflation can cause premature tread wear and possible tyre failure. Over inflation can result in decreased traction, premature wear, and the inability to absorb road impact. Overinflated tyres will show premature wear in the centre of the tread. On the other hand, under inflation will cause sluggish tyre response, decreased fuel economy, excessive heat build-up, and tyre overload. An underinflated tyre will show premature wear on both outside shoulders.

The TPMS warning light will help warn you when your tyre pressure is too low. Your TPMS has various illumination patterns that mean different things. Keep reading to find out what they mean.

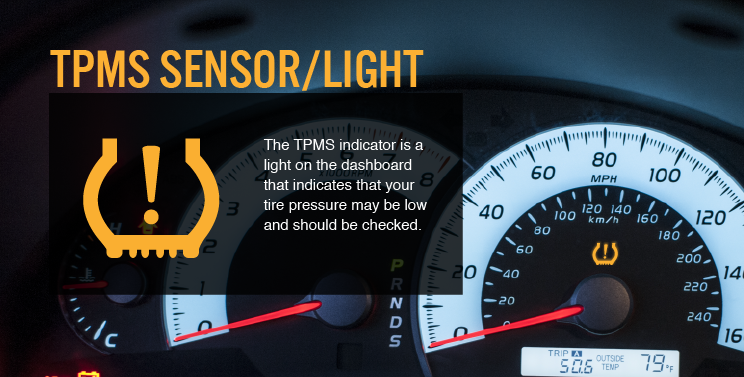
If you’re learning about tyre pressure sensors for the first time, finding the TPMS indicator on your dashboard is simple. It’s a horseshoe-shaped light with an exclamation point in the centre.

TPMS light

WHAT DOES A TPMS WARNING LIGHT MEAN?

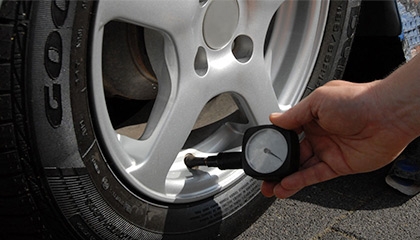
Do you know what to do when the low tyre pressure TPMS symbol illuminates? The first thing to do is manually check your tyre pressures with a gauge and add air until the pressures reach the vehicle manufacturer specification. Keep in mind, your TPMS does not replace routine tyre pressure maintenance. It’s a tool that can help alert you when pressure is low, but a tyre may drop below proper inflation long before the TPMS warning light comes on. The TPMS light comes on when the tyre pressure gets too low or too high.

TPMS LIGHT ILLUMINATES WHILE DRIVING

When the TPMS light comes on – and stays on – at least one of your tyres is at a low pressure level. Check the pressure of all of the tyres with a gauge and determine the cause of pressure loss and add air or service the tyre(s) as appropriate.

TPMS LIGHT GOES ON AND OFF

When tyre pressure(s) are near the level that triggers an alert, fluctuating temperatures may be causing your TPMS light to turn on and off. This typically occurs when pressure decreases overnight due to a drop in ambient temperature that causes the light to turn on; the light may turn off when pressure increases during the day due to rising ambient temperature and/or heat generated from the driving the vehicle. Use a gauge to check the pressure of all of the tyres and add air to any tyre that is low.

TPMS LIGHT FLASHES AND THEN STAYS ON

If the light flashes for approximately 60 to 90 seconds every time you start your car and then remains illuminated, this means the TPMS isn’t functioning properly and you should take it to an automotive service centre for an inspection. Until repaired, the TPMS is out of order and is not able to warn you of low tyre pressure. Check the air pressure of all of the tyres with a gauge and add air to the tyres that need it.

DOES A TPMS REPLACE REGULAR TYRE PRESSURE CHECKS?

No! Understanding what a TPMS warning light means and what to do when it illuminates is an important part of a driver’s responsibility. However, TPMS is not a replacement for regular tyre pressure checks. Why? Depending on the situation, the TPMS may have limitations such as:

  • The TPMS warning light may be set to illuminate below the tyre pressure needed to carry the load in the vehicle.
  • The sensor(s) may not be accurately transmitting tyre pressure data to the on-board computer.
  • The system may not be able to accurately determine if a tyre is too low if other tyres are losing pressure at the same rate.

TPMS overview

Therefore, even with TPMS, manual tyre pressure checks with a gauge are important to caring for your tyres and vehicle, especially for your safety and that of others. You should check tire pressure once a month, and before a long trip or when carrying extra load.

Source: Bridgestone

How to Check Your Car Before a Road Trip

January 24, 2019 / 0 Comments / 1347 / Blog

Planning on going on a road trip soon? Before you do so, you should check your car to make sure that it is in good condition and running well. If you spend a little time preparing your vehicle for the trip beforehand, you can avoid most problems that might ruin your fun along the way.

Part 1. Inspecting Your Vehicle

Image titled Check Your Car Before a Road Trip Step 1
1. Look over the vehicle for signs of issues. While there are a number of specific things you’ll want to check for as you prepare your vehicle for a road trip, a general inspection is a great way to identify any issues you might otherwise miss. Check the condition of the windows, the state of the vehicle’s body, and look for anything that stands out as unusual.
Make a note of any issue you spot to be sure you address them before the trip. This first inspection will inform the things you focus on as you continue preparing your vehicle.
Image titled Check Your Car Before a Road Trip Step 22. See if your windshield wipers need to be replaced. Like any part of a car, windshield wipers can wear out from use. They may also simply dry out and crack over time. Test your windshield wipers and make sure they can displace water effectively. If not, they’ll need to be replaced.
Use windshield washer fluid or some water to test the effectiveness of your wipers. If your windshield wipers are visibly cracked, they need to be replaced.
Image titled Check Your Car Before a Road Trip Step 33. Make sure your tires are properly inflated. Driving on underinflated tires can increase the chances that you’ll have a blowout by causing damage to the tire’s sidewall. It will also hurt your gas mileage. On tires installed by the factory, you can find the right tire pressure in the owner’s manual, but you can also find the tire’s pressure rating printed on the side of each tire.
Use a tire gauge to check the tire pressure in all four tires. If any of the tires are low, add air until they’re at their specified pressure rating.
Image titled Check Your Car Before a Road Trip Step 44. Test all of your exterior lights and the horn. Having working headlights and taillights are important for safe driving at night. Be sure your turn signals are functioning and check your license plate light as well. Turn on the headlights, parking lights, and turn signals, then check to ensure each is lighting up as it should. While you’re testing the lights, honk the horn a few times to make sure it works too.
A blown out license plate light may not be dangerous, but it can get you pulled over. If you need to replace a bulb, you can usually access them from the back of the headlight or tail light assembly. Sometimes, you may need to remove screws that hold the assembly in a bracket or to the body of the vehicle itself.
Image titled Check Your Car Before a Road Trip Step 5
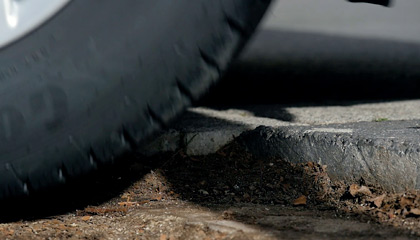
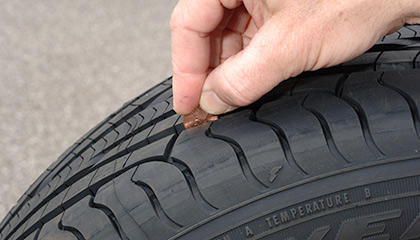
5. Inspect the tread on your tires. Balding tires can be more prone to blowouts and reduce the amount of traction your vehicle has when the roads are wet. Look for signs of damage on the sides of the tire, then use the “penny test” to see if there’s enough tread on the tire.
Place the penny upside down in the groove of the tire and see how much of Lincoln’s head you can see. If you can see further down Lincoln’s head than his forehead, the tires need to be replaced.
Image titled Check Your Car Before a Road Trip Step 66. Check the belts for condition and tightness. Look at the serpentine or accessory belts in your engine (usually located on the front or side) and make sure there is no glazing (shiny spots) or cracking. If there are, the belt will need to be replaced. Then, pinch the belt with your thumb and forefinger and move it up and down to check its tension.
If there’s more than an inch of play in the belt, it may need to be tightened or replaced.
Image titled Check Your Car Before a Road Trip Step 77. Ensure your air filter isn’t clogged. Most vehicles can go tens of thousands of miles without needing to have the air filter replaced, but it’s good to check on the condition of yours before setting out on a trip. The air filter is usually located in the air box attached to the end of an accordion looking plastic pipe often called the intake.
  • Most air boxes are held shut with clips. Remove them to open the box and look at the air filter.
  • The filter should be free of debris and usually white. If it looks particularly dirty, replace it before closing the airbox up again.
Part 2 Addressing Issues that May Arise
Image titled Check Your Car Before a Road Trip Step 8
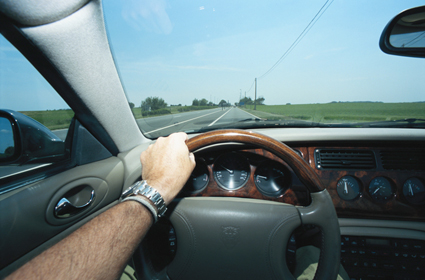
1.Resolve any warning lights on your dashboard. If your check engine light is lit up on your dashboard you can use an OBDII scanner to find out what error code has prompted it. Once you know what’s wrong, you can make a plan to fix it.
  • Plug the scanner into the open plastic connector port beneath the dashboard on the driver’s side.
  • If the scanner doesn’t provide an English description with the error code, you can find the corresponding description in a vehicle specific repair manual or often on the manufacturer’s website.

Image titled Check Your Car Before a Road Trip Step 9

2. Check the oil and add more or change it, if necessary. Start by checking the oil by removing the dipstick, wiping it off with a cloth, reinserting it and removing it again. Look at the level the oil reached on the stick compared to the bottom notch (low limit) and top notch (high limit). If it’s low, you will need to either add some or change the oil.

  • Oil that’s in good condition will be translucent and slightly yellow or even greenish in color.
  • To change the oil, slide a container under the oil pan that can capture the draining oil, then unscrew the drain plug (bolt at the bottom of the oil pan). Once the oil has drained completely, replace the plug and remove the oil filter. Install a new oil filter and then add the correct type and amount of oil for your vehicle, based on the information in your owner’s manual.
Image titled Check Your Car Before a Road Trip Step 103. Top off any other fluids that may need it. Most vehicles rely on a number of different fluids and lubricants to run, ranging from coolant to stop the engine from overheating to windshield washer fluid to help wash the bugs away. Use your vehicle’s owner’s manual to tell you where the reservoir is for the windshield washer fluid and brake fluid, the add some if the level is below the lower mark on each reservoir, indicating its low-fill point.
  • Automatic transmission fluid is one of the most important ones to check before a long road trip. Use your vehicle’s owner’s manual to tell you where to find the dipstick, then check it like you would engine oil.
  • Make sure your radiator is topped off as well by comparing its fill line to the lower limit line visible on the reservoir.

Image titled Check Your Car Before a Road Trip Step 11

4. Remove any corrosion on your battery terminals. While it can be tough to spot signs that a battery may go bad, there are things you can do to ensure your battery has a strong connection to the car’s electrical system. Look for a buildup of corrosion on the battery’s terminals, and if need be clean the battery terminals with a mixture of 1 tablespoon (15 ml) of baking soda and 1 cup (250 ml) of water. Mix the two in a bowl, then use a toothbrush to scrub the combination into the terminals.

Rinse the terminals with a damp cloth after you’re done. Check to make sure the strap that secures the battery in place is tight as well.

Image titled Check Your Car Before a Road Trip Step 125. Replace your brake pads if necessary. If your brakes have been squealing or it’s been more than 50,000 miles since the last time you changed them, you may want to replace them before setting out on a long road trip. Access the brake pads by removing the wheels, then the two bolts securing the brake calipers to the vehicle. Slide the brake caliper off of the rotor, then remove the brake pads from the caliper.
Use a clamp to compress the brake caliper piston back into place before you can insert the new brake pads, then reassemble and repeat on the other wheels. You may also want to have your rotors machined or replaced while you do the brake pads.
Part 3 Preparing to DepartImage titled Check Your Car Before a Road Trip Step 13Clean out the trash in your car. Going on a road trip means you’ll be spending a lot of time in your vehicle, and you’ll need space to store things ranging from luggage to snacks. Cleaning out your car will not only make the ride more comfortable, it will help you stay organized when you need to find things.
Try to avoid packing things over your spare tire or emergency kit if you can. Setting off with a clean and organized car can give you added peace of mind.
Image titled Check Your Car Before a Road Trip Step 14
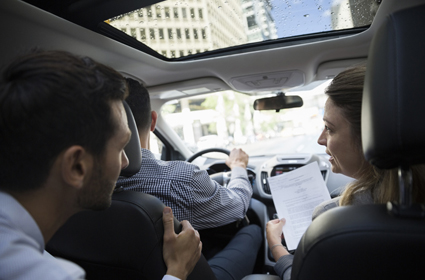
1. Make sure your documents are up to date. To legally drive in the United States, you’ll need to have at least a valid driver’s license and an up to date vehicle registration. Most states also require proof of insurance. Find out what the requirements are where you’ll be traveling, and make sure you meet them.
  • Driving without the appropriate documentation can lead to fines or even having your car impounded.
  • Keep those important documents somewhere you can easily access in case you get pulled over.

Image titled Check Your Car Before a Road Trip Step 15

2. Assemble an emergency kit. At the very least, you should have the tools you need to change a flat tire (emergency jack, tire iron, and spare tire) but you may want to prepare for other potential emergencies as well. Other things you may want are jumper cables, road flares, extra blankets, water, food, rain gear, or a flashlight.

  • It’s also a good idea to carry a first aid kit.
  • You may want to tailor some emergency supplies to your family or time of year. For instance, you may want to carry cat litter to help on slippery roads during the winter.
Source: Wikihow

DRIVING IN WET CONDITIONS

October 15, 2018 / 3 Comments / 1386 / Blog

Properly preparing yourself and your vehicle can give you a better driving experience and keep you safe when driving in wet and rainy conditions.

Preparing to drive in wet conditions
Before you head out, be sure to check on the condition of your vehicle and your tyres.

  • Tyres should have plenty of tread depth to evacuate standing water from between the road surface and your tyre. If your current tyres are worn down to anywhere near the wear bars (2.5mm or 3.0mm), it’s time to think about replacing your tyres.
  • Tyre pressures that are too low or too high can lead to reduced traction, premature tread wear, or tyre damage. Check your tyre pressure regularly (at least once a month) to make sure they’re properly inflated.
  • Being able to see the road in wet conditions is critical to a safer driving experience. Your vehicle’s wiper blades should also be checked for age and wear. If they leave streaks on your windshield, it’s time for a change.
  • It’s also important to make sure your vehicle can be seen in wet conditions. Turn on your lights and make sure that all of them are in working order.


Tips for driving in wet conditions
When it’s time to head out, keep a few of these tips in mind.

  • If your windows are fogging up, use the air conditioner to dehumidify the air inside of your vehicle. If you don’t have an air conditioner system, wind down your rear windows a little to allow air to circulate.
  • Slowing down on wet roads is crucial. Wet roads give you less grip, increase your braking distance and reduce your ability to properly steer around obstacles.
  • Keep a further distance from the car in front of you since braking distances are longer on wet roads. Staying back also keeps you away from the tyre spray of the vehicle in front, giving you better visibility.
  • Jerky or sudden change in steering direction can lead to loss of control, especially on rain-slicked roads so drive with smoother steering.
  • If the rain becomes too heavy and you are uncomfortable with your visibility, stop! Heavy rain can overload your wiper blades, causing a constant sheet of water to flow over the screen, making visibility close to zero.
  • Initial rainfall makes the road very slippery as the mud and oil on dry roads combines with the water to form a rather slippery layer. You’re likely to experience a loss of control so be extra careful of the first half-hour after it begins to rain.
  • Allow some time for your brakes to dry after driving through standing water by tapping your brake pedals lightly.


Source: Goodyear

Functions and Performances of Tires

September 2, 2018 / 4 Comments / 1244 / Blog

The four main functions and seven performance characteristics of tires.

Four functions of tires

 To support a vehicles weight                    To transmit accelerating and braking force to the ground

              To support a vehicles weight                     To transmit accelerating and braking force to the ground

To change/maintain direction                   To absorb shock from the road surface

            To change/maintain direction                                   To absorb shock from the road surface


Seven performances of tires

Fuel efficiency             Wear life

                        Fuel efficiency                                                                        Wear life


Dry grip               Wet grip

                             Dry grip                                                                              Wet grip


Handling stability               Ride comfort

                     Handling stability                                                                Ride comfort

Quietness

                           Quietness

Sources: Bridgestone

5 WAYS TO HELP YOUR NEW TYRES LAST LONGER

June 25, 2018 / 0 Comments / 1358 / Blog

So you’ve just bought a new set of tyres for your car and you’re ready to hit the road. Before you do that, here are a few things to keep in mind to make sure your new tyres last longer and also keep you and your loved ones safe on the road.

article_5tips_to_help_your_new_tyres_last_v3_03

article_5tips_to_help_your_new_tyres_last_v3_06

Drive smoothly
As simple as this sounds, the way you drive your car greatly affects how your tyres wear and how long they’ll last. Smoother gear changes, gentler braking, acceleration and cornering can all help to prevent unnecessary wear to your tyres.article_5tips_to_help_your_new_tyres_last_v3_09article_5tips_to_help_your_new_tyres_last_v3_11article_5tips_to_help_your_new_tyres_last_v3_13


article_5tips_to_help_your_new_tyres_last_v3_15
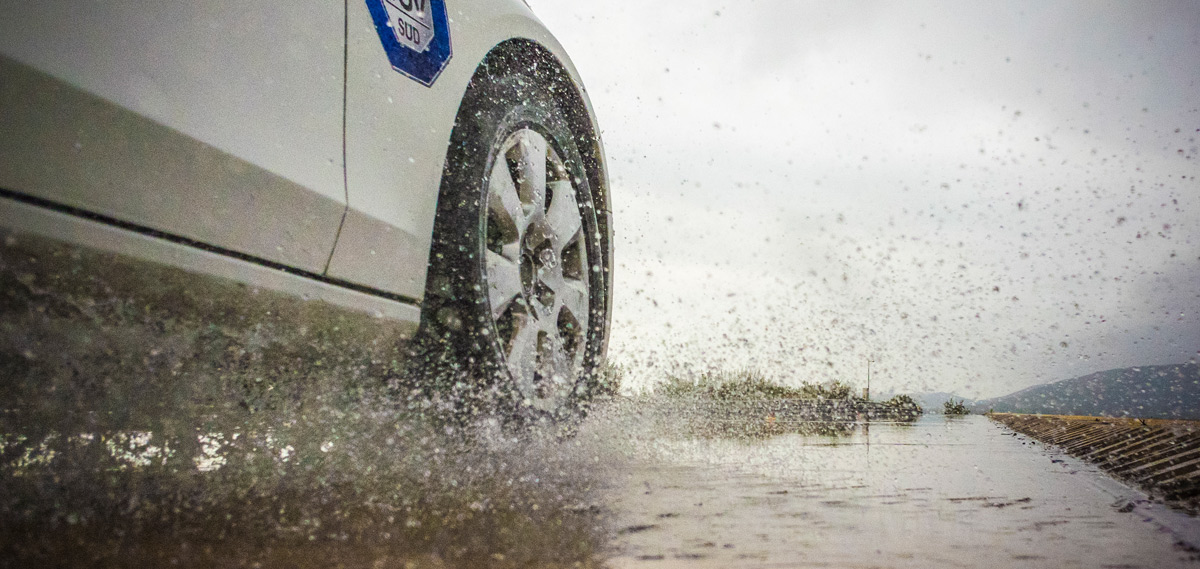
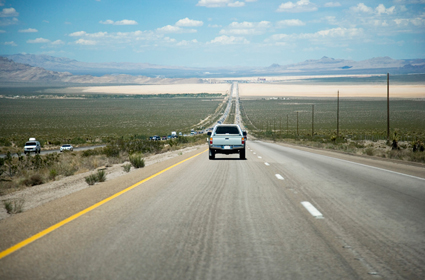
Be aware of where you drive
Another thing that you can do to help prolong the life of your new tyres is to pay attention to the road surface and your surroundings. Whether it’s potholes, uneven roads or even just not parking too close to a kerb, being careful when you drive not only keeps you safe but gives your tyres a longer lifespan too.


Keep your tyres properly inflated     If your tyres are under-inflated, they create excess heat and this can lead to blowouts and make them more likely to puncture. Inversely, if your tyres are overinflated, blowouts can happen too due to overpressure and your treads will wear out a lot faster. That’s why making sure your tyres are properly inflated lets them last longer, and keeps you safer.


Get your wheels aligned
When your wheels are out of alignment, your tyre treads will wear out unevenly. This makes one part of the tyre weaker and more likely to get damaged. By getting your tyres aligned regularly, you can help make sure your treads wear evenly and last longer.


Check your tyres for tread wear
It’s inevitable for the rubber on your tyres to wear off the longer you drive. But what you can do to make sure that the treads wear evenly is to bring them in for check annually. This will not only let you take the necessary actions to prevent uneven tread wear, it also keeps you updated on the state of your tyres and how safe they are.


Source: Goodyear

Are Your Brakes Trying to Tell You Something?

May 21, 2018 / 6 Comments / 1420 / Blog

If your brakes are trying to tell you something, you should pay attention. A properly operating brake system helps ensure safe vehicle control and operation and it should be checked immediately if you suspect any problems, says the non-profit Car Care Council.

“While an annual brake inspection is a good way to ensure brake safety, motorists should not ignore signs that their brakes need attention,” said Rich White, executive director, Car Care Council. “Knowing the key warning signs that your brakes may need maintenance will go a long way toward keeping you and others safe on the road.”

The Car Care Council reminds motorists to look for the following warning signs that their brakes need to be inspected:

  • Noise: screeching, grinding or clicking noises when applying the brakes.
  • Pulling: vehicle pulls to one side while braking.
  • Low Pedal: brake pedal nearly touches the floor before engaging.
  • Hard Pedal: must apply extreme pressure to the pedal before brakes engage.
  • Grabbing: brakes grab at the slightest touch to the pedal.
  • Vibration: brake pedal vibrates or pulses, even under normal braking conditions.
  • Light: brake light is illuminated on your vehicle’s dashboard.

Because brakes are a normal wear item on any vehicle, they will eventually need to be replaced. Factors that can affect brake wear include driving habits, operating conditions, vehicle type and the quality of the brake lining material. Be sure to avoid letting brakes get to the ‘metal-to-metal’ point as that can mean expensive rotor or drum replacement.


Source: Car Care Council

Page 1 of 212

NEED A HAND TO FIND YOUR CAR?

Contact Us
seo by bcz